Okay...maybe it wasn't that dramatic but regardless, my sweet little shelf was the perfect little makeover project. And at $4.99, he quickly leapt into my arms :)
I found this shelf in the midst of another project (to be revealed soon, a revamped china cabinet!) Anyway, I wanted to try this distressing technique that Kate over at Centsational Girl demonstrated here. I thought my shelf would be a great guinea pig to test out before going with the big cabinet.
Loving this price!
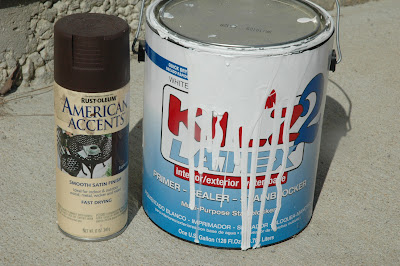
I primed the shelf first which erased my dark brown color of the wood underneath. So, as Kate did, I spray painted the edges a nice and rich expresso color. I used Kilz 2 latex primer because it was what I had on hand. To be honest, I have no idea how reputable it is but it worked just fine both times I used it. For my brown paint, I used Rustoleum Expresso in a satin finish.
Excuse the solo peg there on the shelf. I couldn't get it loose but my Hubby removed it out when he got home.
Now for the fun part. I used Rustoleum's Heirloom White for my final color. I forgot to take a picture of the actual distressing technique for the shelf but I did take one for my cabinet. Not that it helps you at the moment though :) However, Kate's post can give you a good visual in the meantime. Basically, I sprayed the shelf and with my finger underneath a baby wipe, I ran my nail along the edges, wiping off the white and exposing the brown color. Voila, instant distress. A little messy but it looks great.
I bought two hooks at Home Depot for about $3 each. They are a dark rubbed bronze color that I thought contrasted well with the white. I chose to go with this type of hook so I could cover the gaping holes the original pegs left. It worked out perfectly.
And here he is! All spruced up and ready for display. He will probably find his home in my new craft room/office. But more on that later...
Here is an up close one of the distressing detail. Pretty authentic, huh?
And of course...nosy little Too had to scope it out while I was taking pictures.
Breakdown of the Cost:
Shelf - $4.99
Primer - Had on hand
Expresso spray paint - Had on Hand
Heirloom White spray paint - About $3.50
Two robe hooks - $6.00
Total Cost of Shelf - $14.49 plus tax. Not too shabby!


