Wednesday, August 17, 2011

Pillow Palooza: Part 2...Tea Towel to Pillow

As promised (I know you were all anxiously awaiting) here is my next pillow!

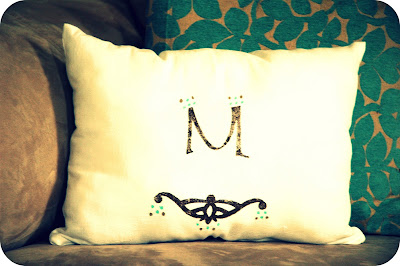
While organizing my hall linen closet I came across this lovely tea towel I received as a hostess gift for a baby shower. I have always loved it but never used it for fear of ruining it. But what was the point in keeping it hidden away in a closet, never to be seen?


After unfolding it I realized it would be the perfect pillow!


My headless-looking assistant agreed.


I ironed the towel and then laid it back flat. I then folded the fabric over, wrong sides out.

I decided to trim some of the edges so the pillow would not be so wide. I folded over the material on each side being careful to measure equal distance between the initial in the middle. Side note: the towel itself was a little off measure to the initial hence the wider fold on the left.


Here it is pinned together (inside out of course) but the right side still had to be trimmed of the excess fabric.


Then I sewed the two pinned sides together. The top obviously did not have to be sewed since this was the fold in the fabric. 

Finally, I sewed the bottom about 3/4ths of the way closed, leaving an opening for filler.

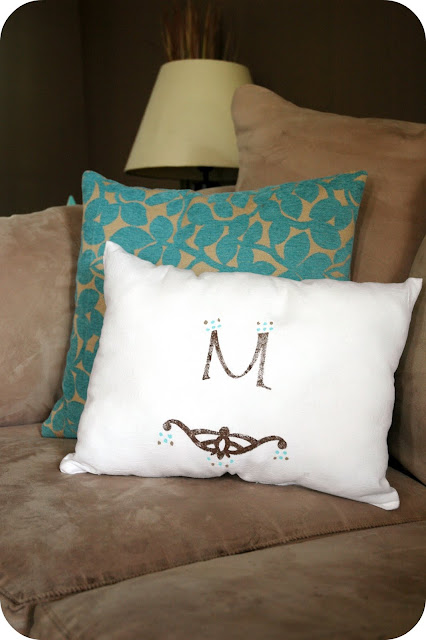
Here it is flipped right-side out.


I filled 'er up using my usual Poly-Fil and managed to squeeze the fatty pillow into the sewing machine to finish up the last quarter of the bottom seam. 

I TOTALLY heart this pillow and I'm so glad people can actually view it now :)

Please excuse the couches. Oh how I hate the micro suede... 


Here's to digging in the closets and using what you have :)

Partying Here!


Pin It!

Wednesday, August 10, 2011

Pillow Palooza: Part 1

I'm becoming a little obsessed with making pillows since I have discovered I can actually work my sewing machine. And I am loving it :)

I fell head over heels for this awesome yellow fabric at Hancock's the other day. It has the cutest grey parrots on it. I originally purchased it to make some valances for my office but decided that since we have our house up for sale and the valance would be custom to the window (i.e. won't be able to use at another house) I thought it best to use for some other projects. I know, I know, I just finished some valances for the kitchen. But I heart this fabric so much I wanted to be sure whatever I made could come with me in the event we move. I had also picked up 2 1/2 yards of clearance fabric for a $1 a yard and the combination of the two fabrics was perfect for a lumbar pillow I decided to make for our bed.


I have been eyeing some adorable lumbar pillows on the web so I had to try my hand at one. The comforter set I purchased a few months ago came with two small rectangular decorative pillows (shown above) that I really never liked much. So why not make one long pillow out of the two small ones? Yes, I think I will.

I pretty much guesstimated through the whole process, learning as I went along. First, I removed the pillow covers off the existing rectangular pillows and pushed them together to form my lumbar pillow shape. Then I draped the yellow fabric over the top and measured and pinned about how much fabric I would need to make just the front and sides of my pillow. Remember I was using the grey flower print as the back.


Then I cut along where my pins were and ended up with this.


See, the one on the left is me and the right is the Hubby. Two little lovebirds parrots :)

Okay, enough with the lame cheesiness. Back to business.

I then repeated the same thing for my grey flower print fabric. I purposely cut more of the yellow fabric than the grey but I wanted the edges to show the yellow and the grey only be in the back. Make sense?

After the fabric was cut I pinned the two sides together with the good side of the patterns facing each other. I pinned them with the pillow inserts inside so I could get as accurate of a measurement as possible. Then I slid the inserts back out. 


Disclaimer: This took me a few tries and a few pin pricks to get it right so if you try this yourself, don't get frustrated! It ended up working just fine :)

I sewed the two long ends first and then stuck my inserts back in to make sure they were fitting okay and they did! I sewed one end closed and flipped the whole thing right side out. I ironed it at this point and then stuffed the inserts back in and got the final side ready to sew. Before I did that though I put just a little bit of Poly-fil in the end to give it a little more cushion. Then I tucked in the edges and sewed as neatly as possible on the final side. 

And here it is!!!!


And of course my model had to get a few shots in...


I have more pillows I am making for the bed so hopefully I will have those to show you soon. But before that I have another pillow I just finished for the couch. Can't wait to show you what I made it out of! Pillow Palooza: Part II is next!

Partying Here!

Chic on a Shoestring Decorating
The Shabby Nest
Pin It!

Wednesday, August 3, 2011

Linen Closet - Organized!

Let me just say that while I love things organized and in their own place, it's something I have to work at, meaning I'm not naturally prone to it. Now I'm not talking about basic cleaning and upkeep of the house. It's more of the inconspicuous things like closets, drawers and cabinets. You know, the stuff no one really sees but you know what's lurking behind those closed doors. I have to stop myself from shoving something into a drawer or cabinet for temporary purposes. Because before I know it, things can start to look like this...


Yep, totally embarrassed. So as to prevent further humiliation, I have decided to get every little space that is not organized whipped into shape. It is such a great feeling to have things nice and organized and I am determined to keep it that way. The first thing I tackled is our linen closet next to our guest bathroom. In case the photo above didn't give you a good view, here are a few more Before photos of the hall junk linen closet.


The first thing I did was pull EVERYTHING out of the closet into the next room to start off with it completely empty. I then sorted through the piles of stuff and started purging. Another confession...it's hard for me to let go of stuff sometimes, even things I never use...I just "might" use one day. I for sure have an inner hoarder that is just dying to be released. I refuse to let it happen though. 

Oh yeah, and that humongous made-for-a-gym-or-huge-house dust mop is outta here! My husband purchased it a long time ago thinking it would be great for doing a quick sweep around the house but storing this monster is too difficult. Not to mention it's hard to maneuver and I much prefer a regular broom. So buh-bye! 

After sorting everything, I calculated how many containers I needed and headed off to Target. Their latest ad listed some cute plastic crates for $3 each - score! I was quickly disappointed when I saw the end cap they were listed at was completely empty :( Back to School College folks apparently stocked up. So I moseyed around the basket section and decided on one $10 canvas tote for my sheets and pillowcases. After venturing to the other end of the store, my wandering eye caught sight of another end cap with 4 of the $3 crates! I took off full speed ahead for fear of someone snatching them from under my nose. I only needed 2 but I seriously contemplated buying all four. See? Hoarder tendencies...

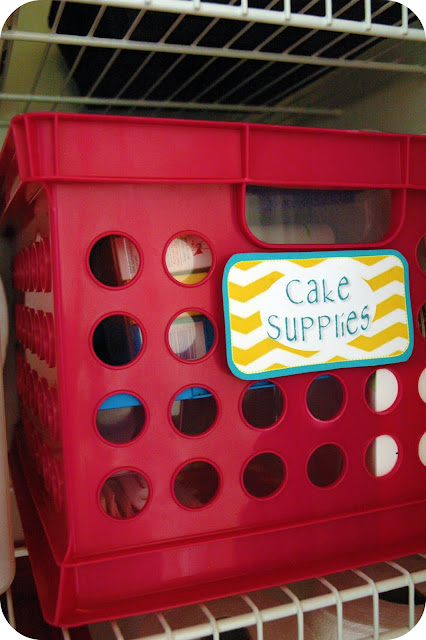
Okay, back to the closet. I used my two crates and organized one with all of my cupcake supplies (I have a small side "business" making mini cupcakes for showers, parties, etc.) and the second crate was used for house maintenance supplies. This includes small tool sets, light bulbs, command hooks and other miscellaneous things. I also used another basket I had on hand to hold linen napkins and some small delicate linens. 

I made a few labels for my new goods and started restocking the closet. I rolled my blankets instead of stacking them and they went back up on the top shelf along with two extra pillows. The next shelf is linens, third is baking supplies and the first-aid kit, and the bottom shelf is house maintenance and paper towels, leaving the very bottom of the closet for my hand-held vacuum and mop and mop bucket.

Here is the much-improved closet space!


And a few of the details...


Curious about the First-Aid kit? I just removed the sticker off the front and used a little of the always-awesome Mod Podge to adhere my label and scrapbook paper matte. Who says a first-aid kit can't be cute? :) :) :)


So there you have it, one horrendous closet revamped into a nice and organized space. I'm loving it! And it only cost me $16 plus tax :) I've got one more awful closet that's going to get revamped soon so stay tuned!

Pin It!