Thursday, July 21, 2011

So-So Sewing and some Pillow Talk

I finally did it. I broke out my brand new sewing machine that I got for Christmas...7 months ago (hangs head in shame). I really had good intentions of getting my new Brother cranked up but kept stalling since I knew I would need plenty of time to read the manual and play around with it. Oh, who am I kidding? I was scared to death of it. Yep, never have I ever used a sewing machine but by golly I wanted to learn!

So last week I pulled everything out and spent an hour learning sewing lingo and exploring every nook and cranny of my sewing machine. Then I wound my bobbin with some pink thread, loaded the top threader and ran through some scrap fabric. And away the needle went, sewing away. Or so I thought. I was beaming with pride for about two minutes when I realized that nothing was happening to my fabric. Turns out my needle did not thread properly. After a few tries I got it fixed and FINALLY saw my first stitches come to life. What a glorious moment. They weren't pretty but gosh darn it they were mine!

As I mentioned back in my yellow phone bench reveal, I had extra fabric from my office chair that I wanted to use to make a pillow.

See the nice and folded fabric sitting there, waiting patiently to be made into a pillow.


Yeah, it sat there for a while...but after much procrastination, I have completed the pillow and my first real sewing project. Yay!

I know to any seasoned seamstress a pillow sounds very basic and yawnish but I couldn't be happier that I finally overcame my silly fear of the sewing machine and gave it a shot. Next up? Sewing some curtains this week! But more on that later :)

For anyone out there like me who had no clue where to even start on a pillow, here are the basic steps I followed:

Just a heads up that the tutorial pictures are cell phone photos. Sorry, camera was dead.

1. Decide on the size for your pillow and add an inch or so on all sides to allow for sewing room.
2. Measure with a straight edge and cut out your two pillow pieces.


Can you see my teensy little mark to the right of the ruler? I marked and drew a light line to have the as even a line as possible.


Sorry no photos for the next few steps. I was in full concentration mode on the sewing machine.

3. Place the two pieces facing each other with the wrong sides out and pin together.
4. Sew three sides in full and the fourth side about one half to three-fourths closed.
5. Flip pillow right-side out and stuff with filling or fill with stuffing, whichever you prefer :)

I used Poly-Fil that I had on hand.


6. Hand-sew or machine-sew the remaining side closed. I chose to use the machine and although it doesn't look very good, you can't tell unless you look up close :) Hey, it's going to take some practice.
7. Fluff and enjoy!

Here's some afters for ya.


Really and truly, I did not do a very good job on the stitches. I let the fabric drift too much and had to realign everything causing the stitches to be wayyyy uneven. I was pleasantly surprised though when I flipped the pillow right-side out. Errors hidden - score!

Like I said earlier, I'm working on some curtains this week and I'm so nervous! Wish me luck!
Pin It!

Saturday, July 9, 2011

What's Hangin?

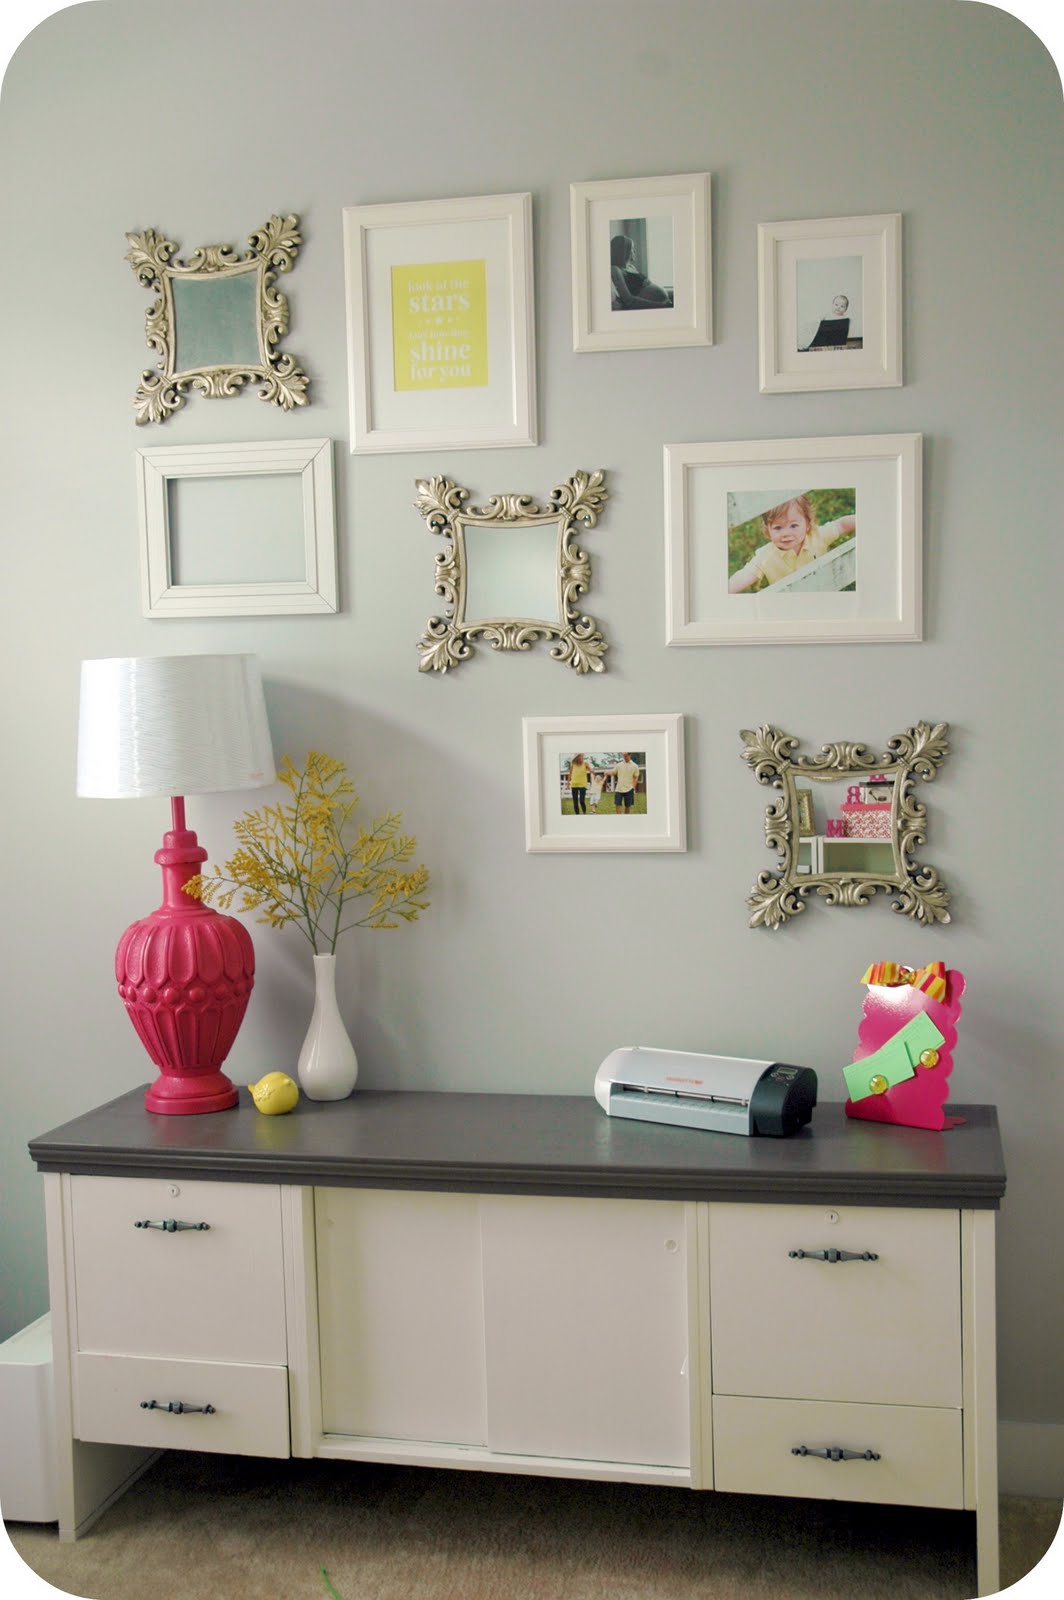
Well that would be a collage above the credenza...that I am finally getting around to posting about. The wall is pretty big and basically the first thing you see when you walk into the room so I thought a collage of things would be a good choice.


We recently purchased several white frames from Ikea and I knew I would use those but I needed something else too. I came across this set of 3 matching mirrors that we have owned for several years. I used them in our first home almost five years ago but I never found the right place for them in this house...until now!

I started out by laying patterns in the floor with the mirrors and frames to get the right look and then started measuring. We measured and hung the mirrors first in a diagonal pattern and basically placed the frames around them.

The lovely orange paper is what I used as my faux frame placement. It's actually from a roll of plastic tablecloth material leftover from little guy's birthday party. And the plastic was full of static so most of the sheets I cut to use clung naturally to the wall. Although this particular one did need a little bit of tape.

I was actually one frame short and since the nearest Ikea is two hours away, I improvised. I found the empty white frame on clearance at Hobby Lobby for like $5. I bought a big key to go inside of it but it's too big :( So now I'm on the look out to find something to fill it. 

And since my office colors are grey, pink and yellow, I wanted the frames to showcase the colors as well. We had little guy's 18 month photo shoot back in May along with some family photos and we all wore yellow...perfect!


The super cute printable was a freebie from Aimee over at Sprik Space. Big thanks to her!


The two small frames up top are older pictures, one from little man at 3 months old and Big Mama up there is one of my maternity photos...about two weeks away from giving birth. What a belly!


One more full shot for ya.


Oh, please excuse the bottom left drawer that is cracked open. Little hands tend to try and get in my stuff so apparently it wasn't closed all the way back. 

But there you have it, my sweet little wall collage. I'm sure it will be tweaked and maybe a few more frames added but I'm loving it right now!

Linking up here!


Chic on a Shoestring Decorating


Pin It!

Sunday, June 12, 2011

Kiddo Chalkboard

When we bought this table and chairs from Ikea, I knew I wanted a chalkboard to add to our little guy's area in my new office.

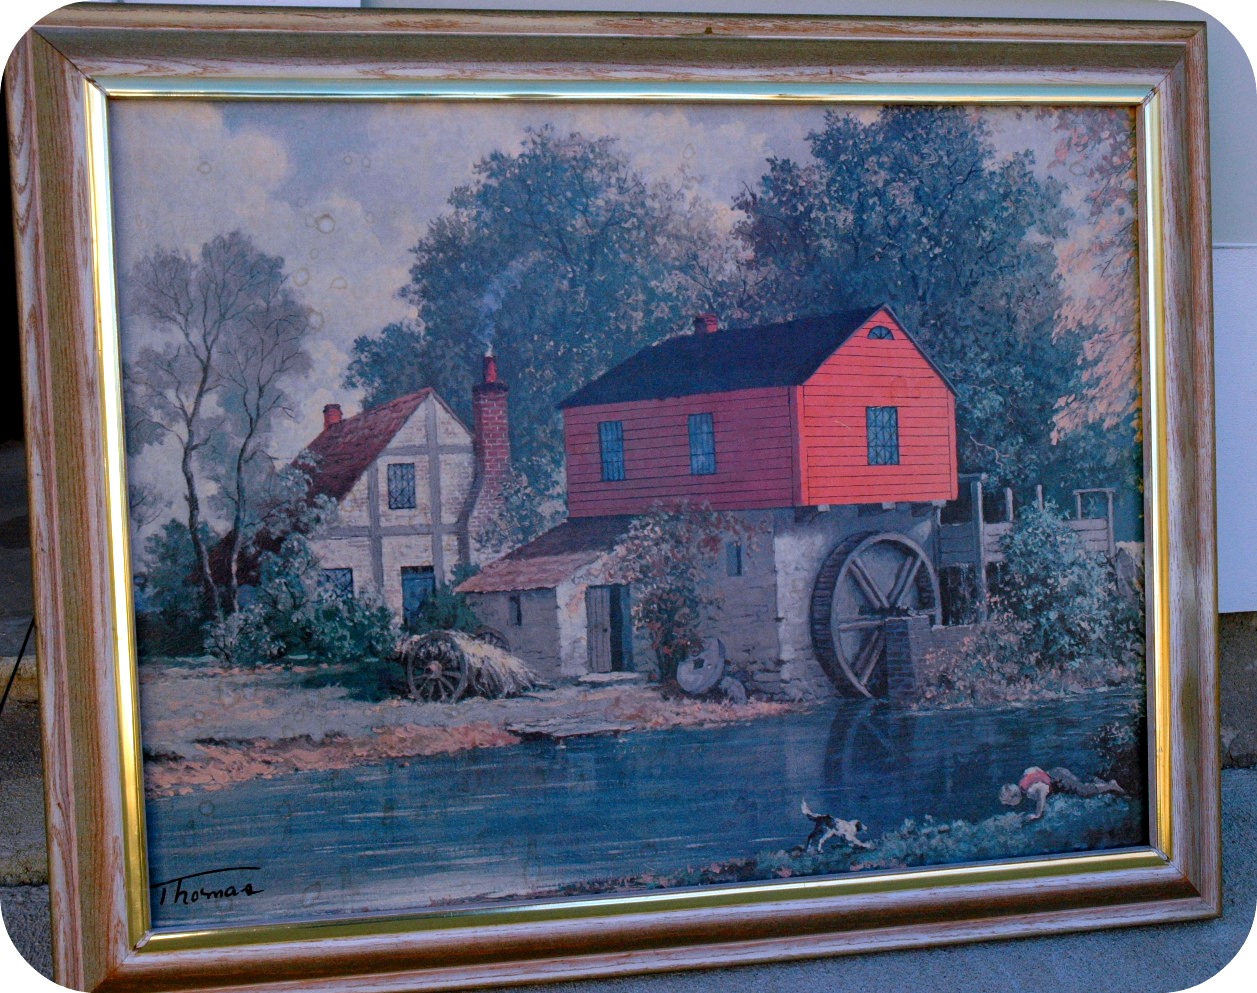
And I took a $2.99 picture and frame from the thrift store and turned it into this!


I have been itching to try my hand at the chalkboard paint so I couldn't wait to get this project started. I found this piece of art from a thrift store for $3 bucks! Wait, have I already said that? Oh well, it's definitely worth the repeat :)


I pried off the gold trim on the inner part of the frame and then removed the picture from the frame.


Then it was time for paint! 


I originally painted the frame a bright sun yellow but since I failed to prime the frame, the wood still showed through a bit despite 30 million coats of yellow paint. Not to mention I didn't really like the boldness of the yellow so I opted to paint it with the yellow paint from my telephone bench which is Valspar's Lemon Curd.

The chalkboard painted very well and I was very pleased with how easy it is to use.


I purchased some small wooden letters from Hobby Lobby to paint and glued on the outer edges of the top and bottom of the frame. I thought they would be perfect for practicing little man's ABC's.


I just brushed on some craft paint with foam brushes, alternating colors with the letters.


After they were dry, I just hot glued them on, piece of cake!

Our little dude is already fascinated by the letters. I love how it turned out and it fits perfectly in his nook of the office.

Here's a few more afters for ya.


I have a few more projects left for the office and will hopefully have a big reveal soon. If you missed any of the previous posts on it, you can check out the brainstorming/kickstarting post, the revamped pink lamp, the precious yellow bench, my office chair and the thrift store credenza makeover.

Partying Here this week!
Keeping It Simple
Domestically Speaking
Photobucket
Chic on a Shoestring Decorating
The Shabby Nest


Pin It!

Thursday, June 9, 2011

DIY Birthday Bliss

So I turned another year older last week and it was fantabulous...if I don't dwell on the fact that 30 is only a few short years away now. No offense to those who are already thirty, flirty and fabulous :)

Anyway, the point of my post is not to try and get a belated birthday wish out of anyone but to show my fellow DIYers some of the goods I got from my awesome family - oh man I am pumped!

Check it out!


I will list them for ya.

A jigsaw
A palm sander
A cute as pie pink tool basket
A plastic hardware organizer
2 clamps
And 1 nail punch :)

My Dad is afraid I will cause severe bodily harm to myself with the saw so he will be giving me a few lessons before I start venturing off on my own.

In addition to these lovely goodies, I got a nice big fan to keep me cool out in the garage. It is a must-have if I'm going to be working out there this summer, although I'm sure it will be paused if I have the spray paint out :)

I can't wait to get to work on some new projects! I have several in the works but I have procrastinated been busy.

Until then - toodaloo!
Pin It!

Tuesday, May 24, 2011

Splendid Crendenza

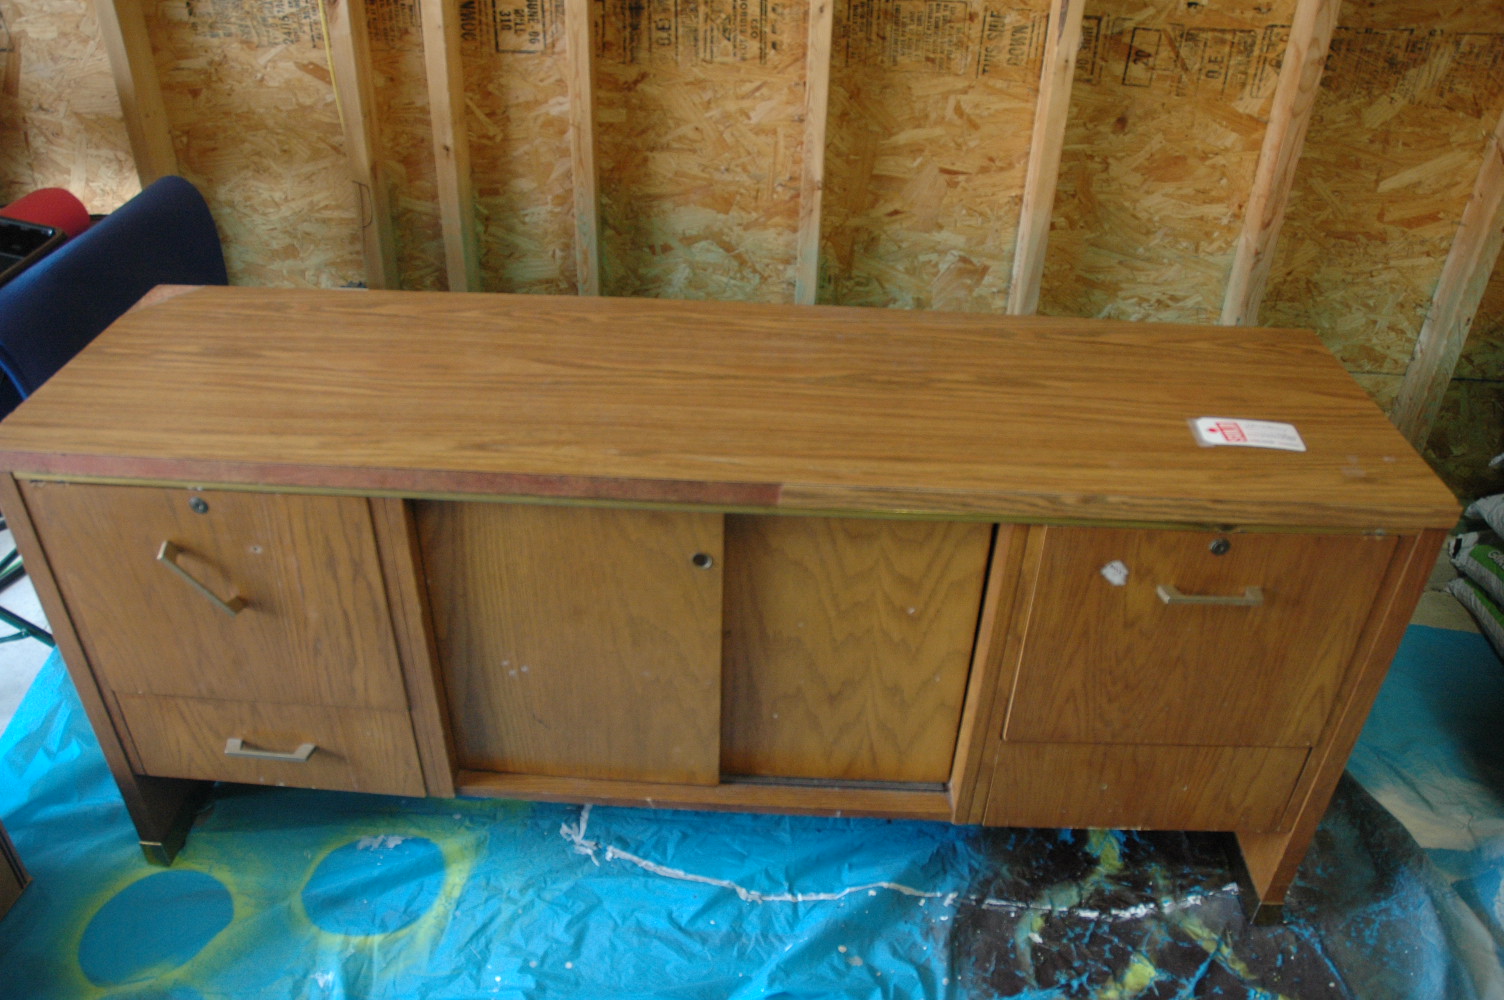
Well folks I can finally post about my thrift store credenza. I bought it over a month ago for $15 bucks! It was originally $30 but it was 50% off, yes!

I needed a good storage piece for my new office and this beauty was just the ticket :)


Oh yeah, she was a real peach...complete with sticky residue, a missing drawer pull and torn off paneling. The Hubby was a bit grossed out. But she's a sturdy gal. And HEAVY. The two of us barely got it into our garage. Thankfully my Daddy had some furniture mover thingies that have wheels on them. They made it so much easier to maneuver Miss Credenze while we worked on her. 

The very first thing I did was clean her up. Good grief, it was pretty bad. But after a near entire container of Clorox wipes, I think I rid every speck of nastiness. 

If you notice in the top picture, part of the front skinny panel is missing, along with the left back corner of the top surface. My dad, who is just amazing, had the idea of adding a new piece of wood to cover the top of the credenza, solving the problem on the top. And trimming it out would take care of the missing half of the front panel as well as adding some stylish flair. 

Also, if you will notice in the second picture, there is gold trim below the front missing panel and again at the bottom of the credenza. It definitely wasn't the look I was going for so we pried it off pretty easily.

We measured the top of Miss Credenze and headed off to Home Depot to purchase some plywood. I love that they handle the cuts for you. One less thing for me to worry about!

Then Daddy and I set to work attaching the new piece. I am new to the power tools so thank goodness for my dad's helping hand. 

Beginning in the center and then working our way out towards each side, we drilled our pilot holes and attached the wood with a bunch of square head screws. 


Daddy drilling a pilot hole

Your girl giving it a go

Who wants to play I Spy? Because I spy something pink (above) and I'm not referring to my t-shirt :) Yep, that's my little ole pink lamp, obviously already painted but still awaiting a new shade. Oh and pardon the chair. That's my thrift store chair I revamped a while back. These two thrifties definitely give away how long Miss Credenze has been in the works.

New top secured
You will notice we removed the two sliding doors. I knew it would be easier to paint that way. I also removed the track they slide on so I could paint it as well.

Next up we had to add the trim. We measured between the top of the new surface to the bottom of the existing half paneling (right above the drawers). We knew it had to be exact since the drawers would be blocked if it was even a fraction too long.

My parents went with me to Home Depot since A) Hubby was still at work, B) someone had to help me pick out the right stuff and C) my child hates shopping so he needed some entertainment.

So we're in the trim section checking out the wide selection of various trim shapes and sizes. The problem we came across was locating one piece of trim that was my exact width...so we were left with finding two complimentary pieces that equaled the correct width. In the midst of our search, little guy made a big ole mess with a sucker so my Dad (the house builder and math whiz of the family) volunteers to take him to the restroom and wash him off, leaving Mom and I alone to calculate trim widths...not very pretty. Definitely not my best subject and let's just face it, "eighths" are confusing. Needless to say, we were thankful when my dad came back on the scene. 

Our best solution turned out to be a flat stick-like trim and a decorative trim that had a groove behind to fit over the flat "stick". The great part is we could adjust it to our desired width.

The flat part attached

Attaching the top grooved piece

One without my hands in the way

All the trim complete!
After we were done I puttied all the screw/nail holes and sanded smooth. I should also mention that I gave the top surface a GOOD sanding to get it really smooth. A few of the trim edges overlapped a little bit but it was instantly fixed with a little sanding of the edges.

My sweet Daddy really did an amazing job showing me how to do this first and major part of the project. Love him!

Next is priming and painting.

I used Zinsser oil based primer to cut out on sanding the entire piece. And it worked great!


I removed all the drawers, drawer pulls and the two locks on the big drawers. I decided to paint the inside of the drawers just because I still had the ick-ness vibe and paint just made me feel better about it :)

I lightly sanded once the primer dried and wiped clean. 

I knew I wanted it two-tone, painting the new top section a dark grey and the remaining piece, white. I chose Behr's Trail Print in semi-gloss for the top and Behr's Swiss Coffee in semi-gloss (which I also used on my china cabinet) for the remainder.

I lightly sanded in between coats giving a nice smooth surface. When it was completely dry, I applied two coats of Wipe-on Poly for a protective coat. 

I scored some adorable vinyl shelf liner in Michael's dollar bins so I lined the bottoms of the drawers with this bit of cuteness. Love!


And once I was done with all that, it moved into the office and sat for several weeks until I decided on what to do about the drawer pulls. I couldn't find any in the local stores that were long enough to fill the existing holes. Mine were 4.25 inches and the longest I found was a little over 3 inches. I know I could have puttied the existing ones and drilled new but honestly, I just didn't want to deal with it (gasp!). So after some procrastination, I finally ordered some purty pulls exactly 4.25 (hole to hole) and they were only a little over $2 a piece. I ordered 4 and my total came in around $16 with shipping. Not too bad. I also purchased two new locks to replace the current ones in the top drawers. This way I have keys! And since they were gold, I also painted them Swiss Coffee to blend with the piece.

And they all fit PERFECTLY!

Introducing Miss Credenze!


Yes, I am purposely not showing you the space above the credenza. That's for another post :)

Here's a few pics of some of my crafting goodies organized in Miss Credenze. I finally have a place to put this stuff! I put fabric and larger items inside the center space behind the sliding doors. No pic of it though.


Wowee that was a long one. I am thrilled the way this piece came together. It was a lengthy process but well worth the effort. More on what's going on above the credenza soon!

Partying Here!

Domestically Speaking
Photobucket


Chic on a Shoestring Decorating
The Shabby Nest
Keeping It Simple
Pin It!