
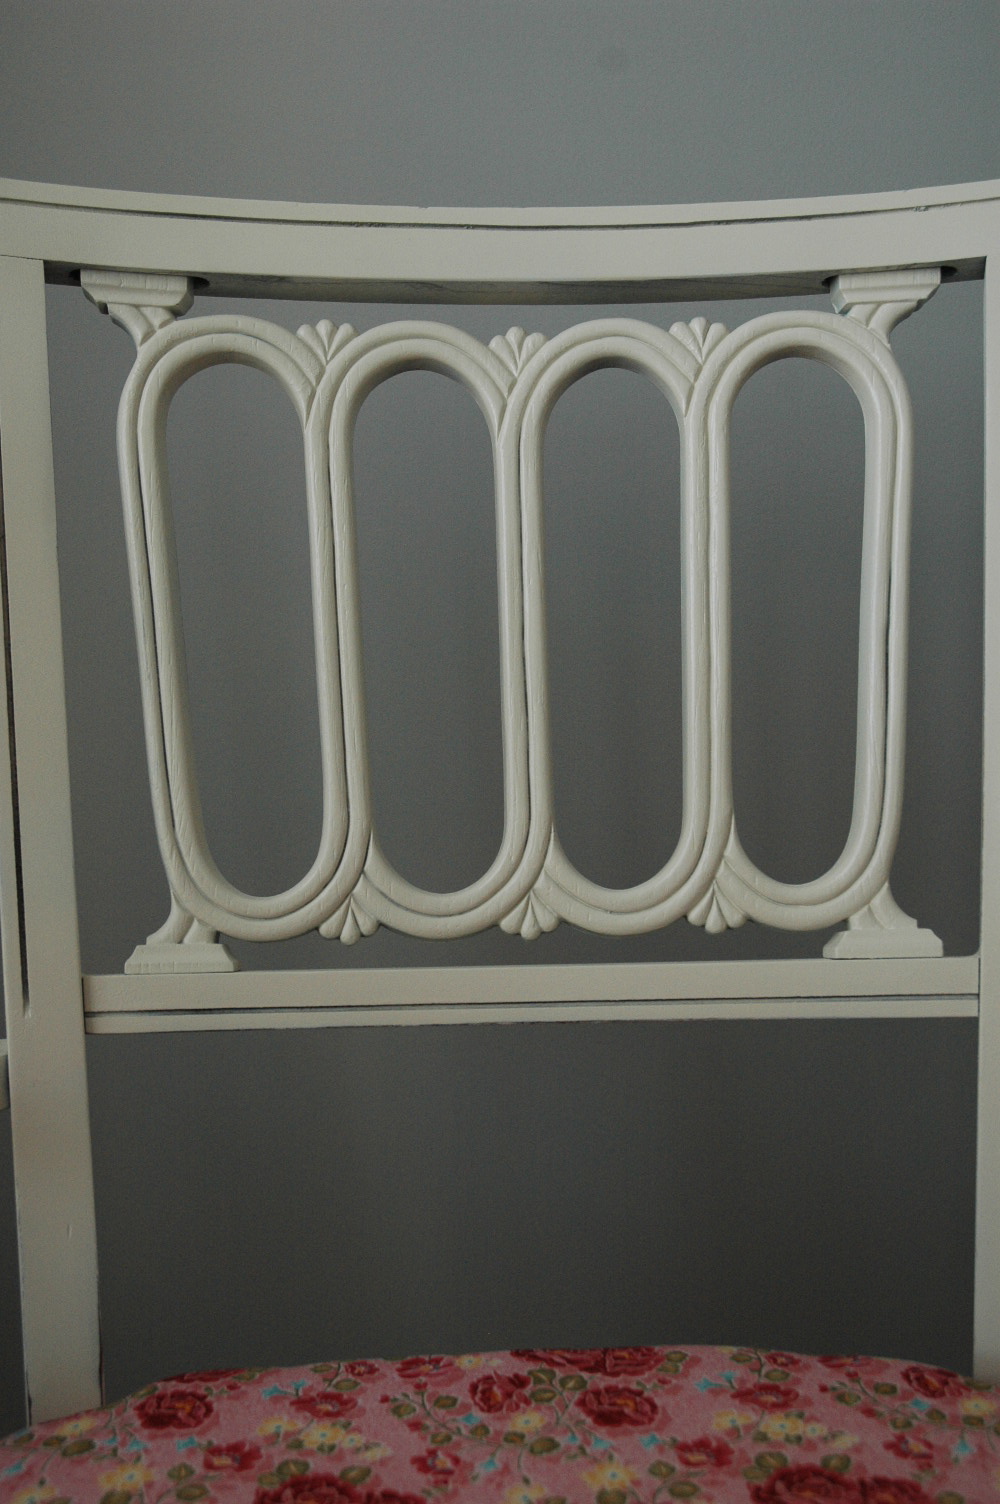
I picked up this chair at a thrift store for $10.00. I thought the back of the chair had a lovely design. All it needed was some reinforcement, new paint and a new cushion.
Okay, before all the details I'll be nice and let you see the Before and After :)
And the Icky Before...

Drumroll please...Ta Da!

Total girl chair :) :) :) :) Me likey.
Now onto the lovely details.
The first thing I did was remove the cushion. It was very simple. There were four screws in the bottom of the chair and I loosened them up and the cushion popped right off.
 |
| A view of the |
 |
| Removing the cushion |
Next up I gave it a good sanding and wiped it down. It was a little rickety so I blobbed wood glue down in between the joints. Now obviously I am no pro but this process seemed to work :) I wiped away the excess and let it dry overnight.


Next I primed it with Rustoleum's white spray paint primer. I did a few coats and let it completely dry.


Once again, after the paint completely dried, I lightly sanded out any rough bumpy areas and made it nice and smooth. I also sanded a few of the edges to give a little bit of the distressed look. I just couldn't resist...
And finally, I added a coat of Wipe on Poly to seal the paint and protect the surface. Sorry no pic of the Poly can. I forgot.
Now on to the seat cushion. The existing cushion was pretty thin and honestly grossed me out so I purchased a piece of foam, batting and of course my new fabric.
But before we get to the new stuff, I had to get rid of the old...ugh. There were 3 layers of fabric on top of the existing cushion. That also means there were 3 layers of old staples...each layer containing more rust than the last. I just knew I was going to end up jabbing myself and rushing to get a tetanus shot. But I was very careful and finally removed all of the nasty little things.
Once I got the base wiped free of rust dust I noticed it had some loose wood. Out came the wood glue again and I sealed 'er right up.

Alright, we are finally getting to the new cushion. I bought both my foam and batting at Hobby Lobby. It was about $10 for both items and I still have lots of batting leftover for future projects. I purchased my fabric at Hancock's for about $4.00.

This was my very first time to recover a chair so I kept avoiding this part as long as possible. But hello, gotta have a cushion for the chair, Laura. So I jumped in there and just learned as I went. My foam square was not quite as wide as I originally thought (note to self: measure before you go to the store) so I improvised. Since the back part of the base is cut to mold to the chair, I needed to cut my foam the same way. I took off a square chunk from each side of the back and put the two chunks up front. It made the front of the cushion be as wide as the base and make it even. Of course I didn't have enough to go all the way down the sides but I think it turned out just fine anyway.

 |
| Warning: Blurry Photo Alert |
I then wrapped the batting snugly over the foam and stapled to the back. I started by stapling the center of each side and then worked my way around.


And side note. At this point I took the cushion inside to cut my fabric to fit and iron it. I left the cushion unattended in the floor while I ironed the fabric and when I returned, the cat had gotten on top of the cushion and rumpled up the nice and tight batting...he almost got booted off the blog for that little stunt. So I huffed and puffed at myself for leaving it alone with him snooping around and went back out to fix the damage. It wasn't too hard to fix so I apologized to him for my rudeness.
I stapled on the fabric and that was it - all done! I really love it. I wanted something very feminine and I think I pulled it off. The fabric pattern has little bits of yellow in the flowers so I think it's going to look great with the color scheme of the new space (grey, pink and yellow).
And a ton few more after pics.


And because I felt bad for getting on to him earlier...he forgave me :)

I hope you enjoyed the makeover. More to come!
Partying Here!


Laura, your chair looks amazing! Great job and thank you so much for using Rust-Oleum.
ReplyDelete- Rust-Oleum Scott
Love the chair! It's amazing how much difference a coat of paint makes! Thanks for a great tutorial.
ReplyDeleteGorgeous chair! What a great transformation!
ReplyDeleteI have a total soft spot for arm chairs...yours turned out great!!! Gotta love Heirloom White! Enjoy your new chair!
ReplyDeletegreat chair! and what a beautiful kitty!!
ReplyDelete